项目09 四位数码管#
1. 项目介绍:
四位数码管是一种非常实用的显示器件,电子时钟的显示,球场上的记分员,公园里的人数都是需要的。由于价格低廉,使用方便,越来越多的项目将使用4位数码管。
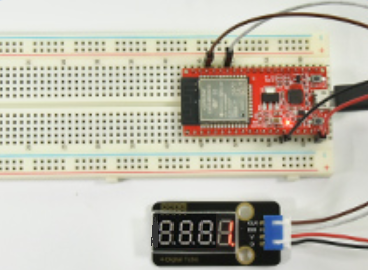
在这个项目中,我们使用ESP32控制四位数码管来显示四位数字。
2. 项目元件:
|
|
|
|---|---|---|
ESP32*1 |
面包板*1 |
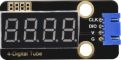
四位数码管*1 |
|
|
|
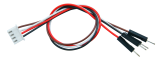
4P转杜邦线公单*1 |
USB 线*1 |
3. 元件知识:
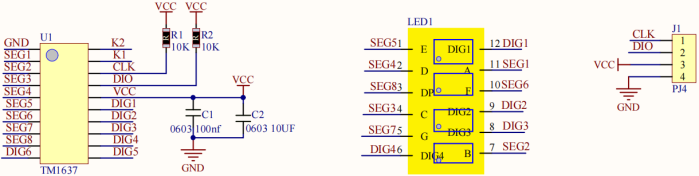
TM1650四位数码管: 是一个12脚的带时钟点的四位共阴数码管(0.36英寸)的显示模块,驱动芯片为TM1650,只需2根信号线即可使单片机控制四位数码管。控制接口电平可为5V或3.3V。
G:电源负极
V:电源正极,+5V
DIO:数据IO模块,可以接任意的数字引脚
CLK:时钟引脚,可以接任意的数字引脚
4位数码管模块规格参数:
工作电压:DC 3.3V-5V
工作电流:≤100MA
最大功率:0.5W
数码管显示颜色:红色
4位数码管模块原理图:
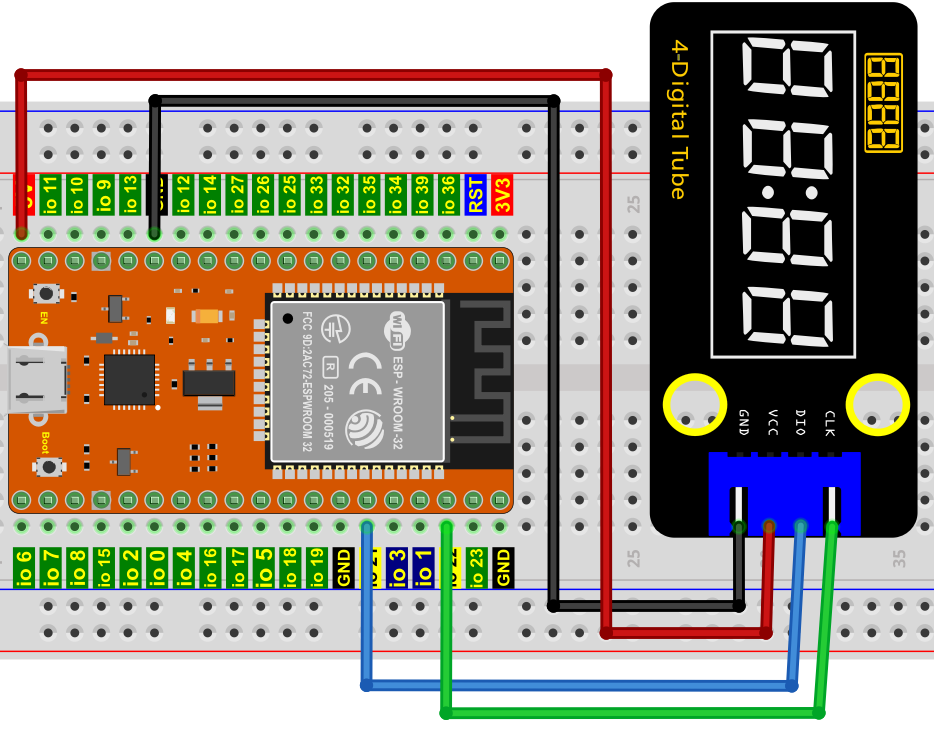
4. 项目接线图:
5. 项目代码:
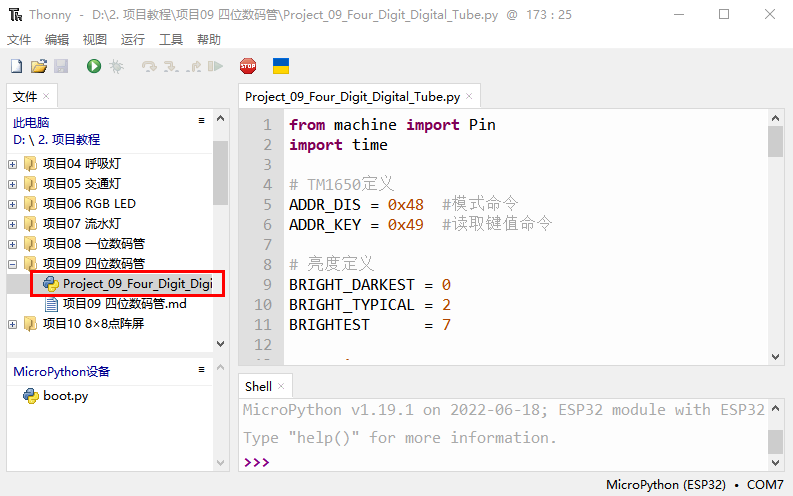
你可以把代码移到任何地方。例如,我们将代码保存在 D盘 中,路径为D:\2. 项目教程。
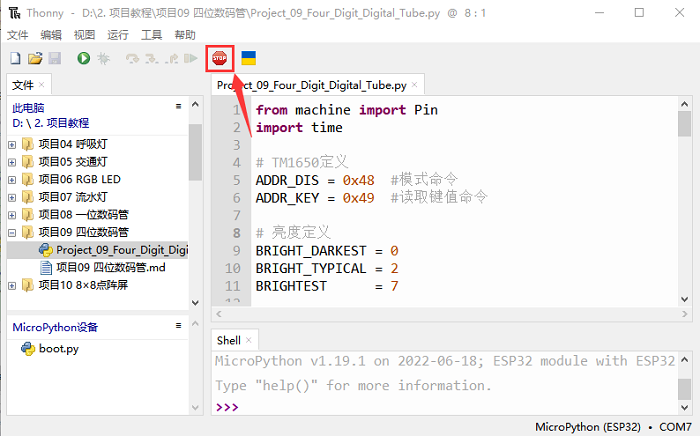
打开 “Thonny” 软件,点击 “此电脑” → “D:” → “2. 项目教程” → “项目09 四位数码管”。并鼠标左键双击 “Project_09_Four_Digit_Digital_Tube.py”。
from machine import Pin
import time

# TM1650定义
ADDR_DIS = 0x48  #模式命令
ADDR_KEY = 0x49  #读取键值命令

# 亮度定义
BRIGHT_DARKEST = 0
BRIGHT_TYPICAL = 2
BRIGHTEST      = 7

on  = 1
off = 0

# 数字:0~9
NUM = [0x3f,0x06,0x5b,0x4f,0x66,0x6d,0x7d,0x07,0x7f,0x6f]
## DIG = [0x68,0x6a,0x6c,0x6e]
DIG = [0x6e,0x6c,0x6a,0x68]
DOT = [0,0,0,0]

clkPin = 22
dioPin = 21
clk = Pin(clkPin, Pin.OUT)
dio = Pin(dioPin, Pin.OUT)

DisplayCommand = 0

def writeByte(wr_data):
    global clk,dio
    for i in range(8):
        if(wr_data & 0x80 == 0x80):
            dio.value(1)
        else:
            dio.value(0)
        clk.value(0)
        time.sleep(0.0001)
        clk.value(1)
        time.sleep(0.0001)
        clk.value(0)
        wr_data <<= 1
    return

def start():
    global clk,dio
    dio.value(1)
    clk.value(1)
    time.sleep(0.0001)
    dio.value(0)
    return

def ack():
    global clk,dio
    dy = 0
    clk.value(0)
    time.sleep(0.0001)
    dio = Pin(dioPin, Pin.IN)
    while(dio.value() == 1):
        time.sleep(0.0001)
        dy += 1
        if(dy>5000):
            break
    clk.value(1)
    time.sleep(0.0001)
    clk.value(0)
    dio = Pin(dioPin, Pin.OUT)
    return

def stop():
    global clk,dio
    dio.value(0)
    clk.value(1)
    time.sleep(0.0001)
    dio.value(1)
    return

def displayBit(bit, num):
    global ADDR_DIS
    if(num > 9 and bit > 4):
        return
    start()
    writeByte(ADDR_DIS)
    ack()
    writeByte(DisplayCommand)
    ack()
    stop()
    start()
    writeByte(DIG[bit-1])
    ack()
    if(DOT[bit-1] == 1):
        writeByte(NUM[num] | 0x80)
    else:
        writeByte(NUM[num])
    ack()
    stop()
    return

def clearBit(bit):
    if(bit > 4):
        return
    start()
    writeByte(ADDR_DIS)
    ack()
    writeByte(DisplayCommand)
    ack()
    stop()
    start()
    writeByte(DIG[bit-1])
    ack()
    writeByte(0x00)
    ack()
    stop()
    return


def setBrightness(b = BRIGHT_TYPICAL):
    global DisplayCommand,brightness
    DisplayCommand = (DisplayCommand & 0x0f)+(b<<4)
    return

def setMode(segment = 0):
    global DisplayCommand
    DisplayCommand = (DisplayCommand & 0xf7)+(segment<<3)
    return

def displayOnOFF(OnOff = 1):
    global DisplayCommand
    DisplayCommand = (DisplayCommand & 0xfe)+OnOff
    return

def displayDot(bit, OnOff):
    if(bit > 4):
        return
    if(OnOff == 1):
        DOT[bit-1] = 1;
    else:
        DOT[bit-1] = 0;
    return

def InitDigitalTube():
    setBrightness(2)
    setMode(0)
    displayOnOFF(1)
    for _ in range(4):
        clearBit(_)
    return

def ShowNum(num): #0~9999
    displayBit(1,num%10)
    if(num < 10):
        clearBit(2)
        clearBit(3)
        clearBit(4)
    if(num > 9 and num < 100):
        displayBit(2,num//10%10)
        clearBit(3)
        clearBit(4)
    if(num > 99 and num < 1000):
        displayBit(2,num//10%10)
        displayBit(3,num//100%10)
        clearBit(4)
    if(num > 999 and num < 10000):
        displayBit(2,num//10%10)
        displayBit(3,num//100%10)
        displayBit(4,num//1000)

InitDigitalTube()

while True:
    #displayDot(1,on)     # on or off, DigitalTube.Display(bit,number); bit=1---4  number=0---9
    for i in range(0,9999):
        ShowNum(i)
        time.sleep(0.01)
6. 项目现象:
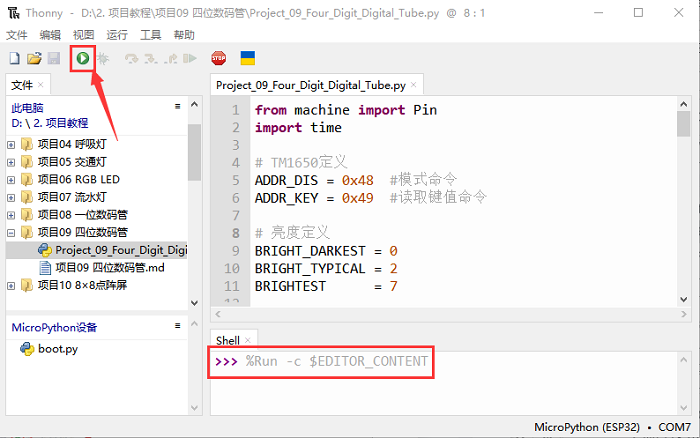
确保ESP32已经连接到电脑上,单击  。
。
单击  ,代码开始执行,你会看到的现象是:四位数码管显示数字,数字逐渐加1。按 “Ctrl+C” 或单击 退出程序。